 Sohail Ahmad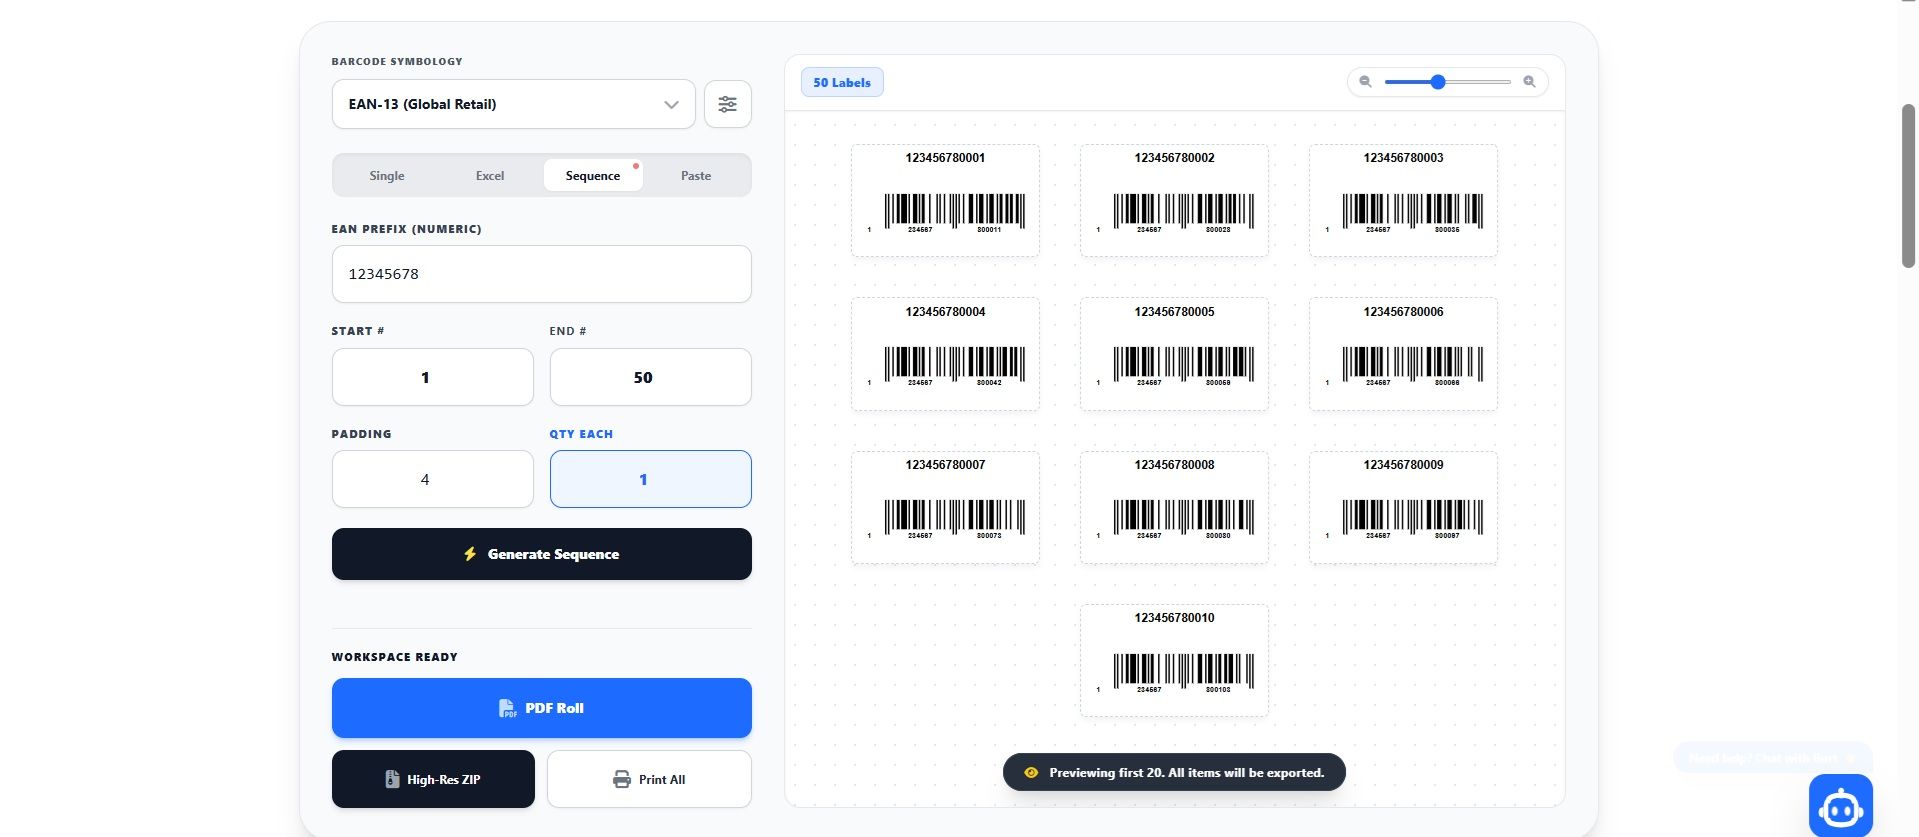
目录
Whether you are labeling packages for a growing Amazon FBA business, prepping Noon FBN shipments, or managing inventory tracking for a fleet of delivery vans, manually typing SKUs into a label printer is a massive drain on your operational efficiency.
The secret to scaling your logistics operations lies in the software you already use every day: Microsoft Excel. By pairing your spreadsheets with a powerful bulk barcode generator, you can transform hours of tedious warehouse labor into a five-second automated workflow.
In this comprehensive guide, we will teach you exactly how to format your data, avoid critical GS1 formatting errors, choose the right symbology, and use an Excel Barcode Generator to print perfectly aligned, high-resolution labels for your thermal printers. Let’s dive in.
1. Understanding the Excel Data Mapping Workflow
Before we open the software, it is vital to understand how a batch barcode generator actually processes data. When you export an inventory list from Shopify, Salla, WooCommerce, or your Enterprise Resource Planning (ERP) system, you are left with a massive grid of raw data. The generator acts as a mathematical bridgeâ€â€Âit reads that grid, extracts the relevant identifiers, and visually translates them into vertical black and white matrices that a laser scanner can read instantly.
To do this successfully, your Excel file (`.xlsx` or `.csv`) must be structured in a way that the software can cleanly parse. Modern tools utilize intelligent client-side algorithms to find your data, meaning you rarely have to adhere to rigid, complex templates. You simply need clear column headers.
Pro Tip: Test Before You Scale
If you only have a few items to test before running a massive 5,000-row spreadsheet, you can always test your layout using our Free Single Barcode Generator to ensure your scanner reads the physical print perfectly before committing to a bulk roll.
2. Step-by-Step: Formatting Your Excel Spreadsheet
The foundation of a successful batch generation is a clean spreadsheet. Open Excel, Google Sheets, or Apple Numbers. You will want to create three specific columns in the very first row (the Header row). If your headers are pushed down to row 3 or 4, the software will fail to parse the list.
Here is exactly how your spreadsheet should look to ensure perfect mapping:
| A: SKU (or Barcode/ID) | B: Title (Product Name) | C: Qty (Quantity) |
|---|---|---|
| TSHIRT-BLU-MED | Premium Cotton T-Shirt - Blue (M) | 50 |
| MUG-WHT-001 | Ceramic Coffee Mug - White | 120 |
| 9780201390115 | Inventory Log Book v2 | 15 |
Understanding the Data Columns:
- SKU / Barcode (Strictly Required): This is the explicit data that will be encoded into the barcode lines. It can be letters, numbers, or dashes depending on your format (e.g., Code-128 allows letters, UPC does not).
- Title (Highly Recommended): This is the human-readable text that will print above the barcode. It ensures your warehouse prep staff or 3PL knows exactly what item the sticker belongs to without needing to blindly scan it.
- Qty (Optional but Powerful): This tells the software exactly how many physical copies of this specific label to print. In the example above, the system will automatically generate 50 consecutive labels for the Blue T-Shirt, followed immediately by 120 labels for the Mug.
3. Preventing the "Leading Zero" Excel Error
One of the most common catastrophic errors operations managers face when generating bulk retail barcodes involves Microsoft Excel's auto-formatting logic. Because UPC and EAN codes are numeric, Excel naturally treats them as math values rather than text strings.
Many GS1 Company Prefixes begin with the number "0" (e.g., 01234567890). If you paste this into a standard Excel cell, Excel will automatically strip the leading zero, converting it to 1234567890. If you attempt to generate a 12-digit UPC from this truncated 11-digit string, the GS1 Check Digit calculation will fail, and the barcode will be completely invalid for Amazon or Walmart.
The Fix: Before importing your `.xlsx` or `.csv` file into our workspace, you must highlight your SKU column in Excel, right-click, select "Format Cells," and change the category from "General" to "Text". This forces Excel to retain the leading zeros.
4. Uploading and Mapping the Data
Once your file is saved as an `.xlsx` or `.csv`, it is time to generate the visual labels. Because our platform uses secure client-side rendering (CSR), your proprietary inventory data is processed directly in your local browser window. It is never uploaded to an external server.
- Navigate to the Data Source panel on the left side of the workspace.
- Click on the Excel tab.
- Click the upload dropzone or drag-and-drop your saved spreadsheet directly into the browser.
- The Magic Moment: The system's algorithm will instantly scan your file, detect the headers, and map the quantities. Within milliseconds, a real-time preview of your massive print job will populate in the center grid.
5. Configuring Your Hardware Print Settings
Seeing the barcodes on your screen is only half the battle; ensuring they print perfectly on your specific label rolls is where most businesses struggle with margin drift. You must configure the physical sizing in the Advanced Settings panel.
- Select the Barcode Format: If your internal SKUs use letters or dashes, you must select Code-128. If your data consists of pure 12-digit or 13-digit numbers meant for retail store scanning, select UPC-A or EAN-13.
- Physical Label Sizing: Measure the physical thermal stickers inside your printer. Common sizes are 50x30mm for standard product inventory, or 100x150mm for shipping/freight. Select the corresponding preset, or enter custom millimeters.
- Padding & Font Adjustments: Adjust the padding to ensure the barcode lines do not bleed off the edge of the sticker. Tweak the font size so your product titles remain readable if you are using tiny 40x20mm labels.
6. Exporting the PDF Vector Roll
With your preview looking flawless, look to the bottom action toolbar. You now have the option to export the entire batch to your local machine.
Clicking PDF Roll will instruct the software to compile every single label (factoring in the exact quantities you requested) into a multi-page, high-resolution PDF document. Because you set the physical dimensions in Step 5, you can open this PDF, hit "Print", select your Zebra or Rollo thermal printer, and the machine will rapidly spit out a continuous, perfectly aligned roll of stickers.
Alternatively, if you are sending these barcodes to a manufacturer overseas or a graphic designer for retail product packaging, you can select the Bulk ZIP option. This will download a compressed folder containing thousands of individual, transparent `.png` image files neatly named after their respective SKUs.
Start Generating Bulk Barcodes
Stop typing SKUs manually. Launch the workspace and convert your Excel sheets into high-res thermal rolls instantly.
Stop fighting with outdated desktop software and manual data entry. Structure your spreadsheet, upload it to the secure workspace, and let the automation do the heavy lifting for your distribution workflow today.